
Back in 2018 I built an acoustic drum robot but never got around to posting anything about it. Some of the details are a little fuzzy at this point but I’m going to try and explain how it works in this post.
Video for context:
Some footage showing more closely the capabilities of the robot
Goal
The goal of this project was to create a percussion robot suitable for playing acoustic music; stuff with guitar, piano, and vocals. This robot is not meant for loud electric music because the actuators used are not very strong. That being said, some of the info here would probably work for building stronger, louder robots.
We’re also not trying to build a robot that plays a full drum kit here, but just the pieces of percussion that are common in acoustic music.
For example:
- Shakers
- Tambourine
- Snares with brushes
- Some sort of kick drum sound
The Grand List of Things That Didn’t Work
I tried a bunch of wacky stuff while building this, here’s a list of things that didn’t work.
Car Door Locks
These things are what you’d find in old car door mechanisms. They’re too dang loud for this application and its hard to get any sort of velocity control with them.
Stepper Motors

These are also too loud because they make a really high pitched noise when they move.
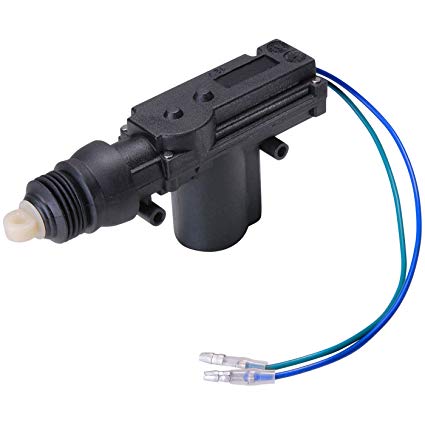
Solenoids

I thought these were going to be the best solution and most other people online were also using them for projects like this. I spent a while building prototypes using them.
Here’s a really early prototype with popcorn included:
The main problem with these is The Solenoid Click™️. They make a pretty loud clicking noise and I just could not get rid of it. You can try doing stuff like putting foam under the springs or adding rubber bands in various places but it ends up being not enough to dampen the sound, or it greatly reduces the solenoid force.
Another problem is if you have a percussion instrument that is swung, like a shaker, the solenoids don’t have enough range of motion to get a realistic sound.
Finally there’s situations where you want to move the arm of an instrument to some position and hold it there. These solenoids get really hot after awhile if you keep them activated, which seemed sketchy.


Servos to the rescue!
So I found that buying some decently strong servos worked the best. I used Hitec HS-311 servos which I think are normally used for RC cars/airplanes. This ended up being the lowest noise method and they have a big range of motion (180 degrees?).

Now servos aren’t super quiet in their own right, but I read somewhere online that you could pack them with grease to make them quieter and that actually reduced noise a lot.


Once I saw these were quiet enough I attached them to wooden blocks and built a couple different percussion instruments. Each instrument has an XLR jack used to connect the servo to a controller hub device described further down this page.


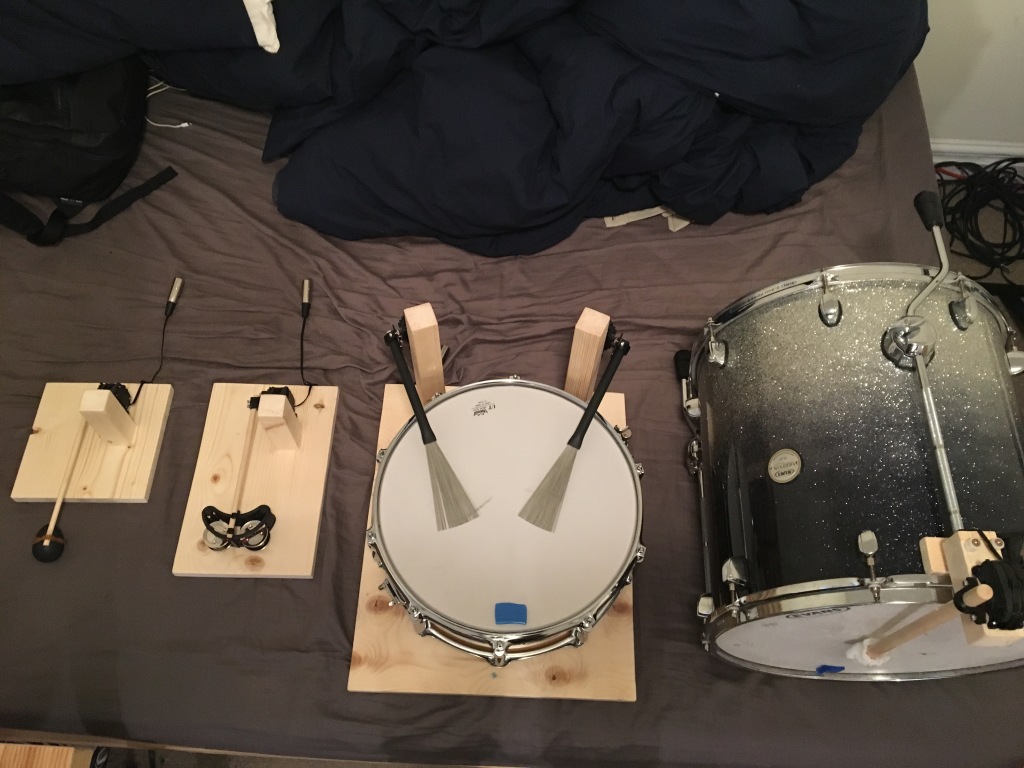
I don’t have a good picture of it but another key detail is that the servos are wrapped in foam before attaching them to the wood blocks. You want them mechanically decoupled from the wood, otherwise any noise they make resonates through the wood and ends up louder.

The clamps for the drum sticks and a few other misc. pieces were modelled in Onshape then printed on a TEVO Tarantula 3D printer.
The Controller
I built a little controller box that converts MIDI signals to servo angle commands (aka servo PWM signals).
On the input side we have MIDI in and power.

On the output we have 6 XLR jacks, each mapped to a separate MIDI channel.

Inside is an Arduino Uno with a MIDI shield and some terminal blocks to distribute power/PWM signals.


Putting It All Together
All together the system looks like this:

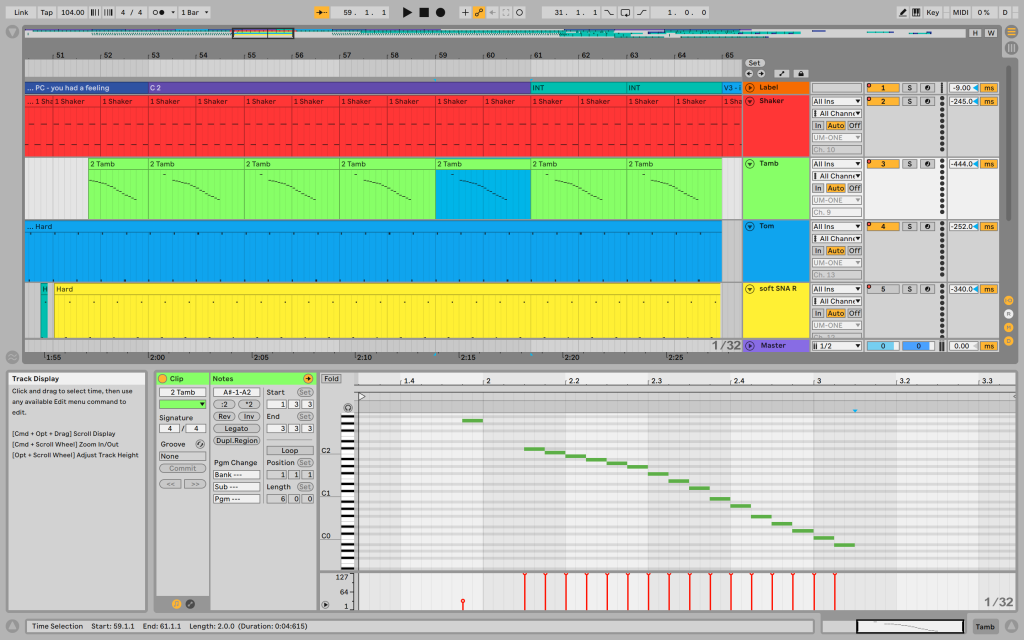
The key thing here is that the Arduino controller maps MIDI note values to servo angles, and midi velocity values to the speed at which we move to those angles. For example if I sent a MIDI message (note: C2, velocity: 120), then every 1ms the controller will step the servo towards the C2 angle using some increment size determined by the velocity value.
This means we end up with a mapping on a piano roll that looks like this:

This gives you a lot of dynamic control because you can draw velocity or note curves right on to the piano roll to get smooth movements. This is really the key part of this project because you need this dynamic control for acoustic music, especially for things with a lot of dynamic range like snare rolls or shaker patterns with accents.
A full session in Ableton looks like this:
- Each MIDI track is assigned to a different MIDI channel, which is used by the Arduino controller to determine which servo to move.
- Using the Ableton track delay feature on the right is really important to keep everything synchronized.
For each drum hit I followed this procedure:
- Draw the note/velocity pattern for the drum hit and get it sounding good on its own.
- Make the session click track play out loud in the room.
- Play the drum hit as a loop.
- Adjust the track delay until the drum hit is synchronized with the click track.
Once you do this you can arrange the rest of the session similar to how you would do a normal track.
Now the harder challenge is keeping the human in sync 😉.
Source Code
Here’s a link to the Arduino source code in case anyone is interested in building something similar.
Tristan

Very cool, this is inspiring!
LikeLike
Awesome! Very inspiring, thanks for sharing!
LikeLike
Hi Tristan! Exactly the thing i’d like to do for my project.
Could tell me how you power the servos? Is there an additionnal source or the same 9v as the arduino?
Thks
LikeLike
The Arduino and servos share the same power supply. I used a 5V, 2500mA AC adapter I found lying around.
LikeLike
Hi Tristan ! very cool work! What is the power source for both arduino and servos ? is it the same for all? thks
LikeLike
The Arduino and servos share the same power supply. I used a 5V, 2500mA AC adapter I found lying around.
LikeLike
So cool! but how did u conect the midi input?
LikeLike
Is there a more detailed step by step of how to do this project?
LikeLike